Table of Contents
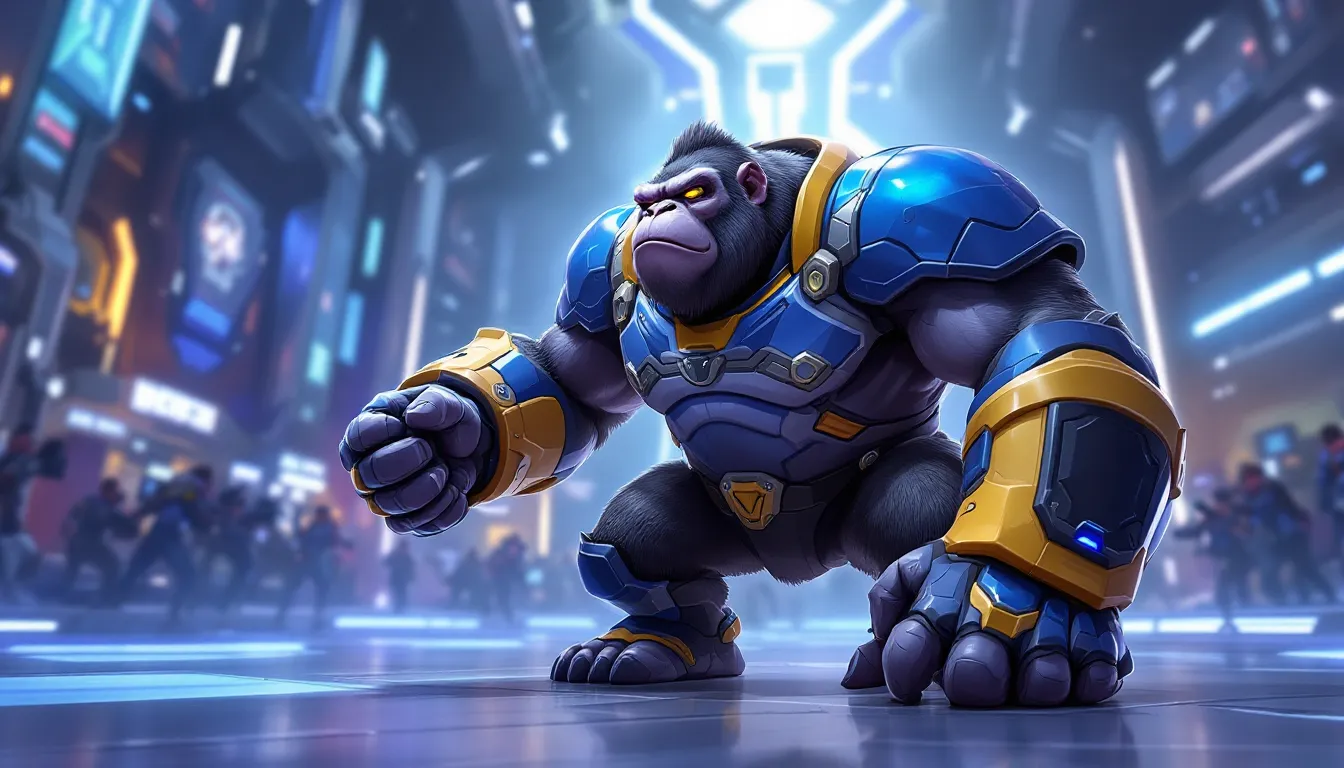
ToggleWinston’s roar echoes across Overwatch 2 maps, and for good reason, he’s one of the most impactful off-tanks in the game when played correctly. Whether you’re climbing ranked or just want to understand one of gaming’s most iconic characters, mastering Winston separates the players who feed ultimate economy from those who carry games. This guide breaks down everything you need to know about Overwatch’s genius gorilla: his kit, positioning, teamfight mechanics, common pitfalls, and the advanced techniques that turn casual Winston players into threats opponents genuinely fear. If you’ve watched esports or high-level competitive play, you’ve seen Winston dictate entire rounds from the jump pack, now it’s your turn to learn how.
Key Takeaways
- Overwatch Winston excels as a disruptor rather than a traditional tank, using mobility and space creation to force enemies into difficult positions instead of absorbing damage like main tanks.
- Master Jump Pack engagements, barrier timing, and high-ground positioning to avoid common pitfalls like overextending without team support or wasting Barrier Projector defensively.
- Coordinate Winston dives with teammates before engaging—confirming healer readiness and DPS positioning transforms solo feeding into team-winning plays that isolate priority targets.
- Study professional esports gameplay and Winston matchups to understand when he counters passive playstyles (strong vs. Widowmaker, Bastion, Torbjörn) and when to avoid direct engagement (weak vs. Reaper, Sombra).
- Consistent high-ground control, momentum-based jumping, and ultimate economy management separate competitive Winston players from casual ones—invest 50–100 focused games to develop intuition that accelerates rank climbing.
Who Is Winston And Why Does He Matter?
Winston is Overwatch’s primary off-tank, a character designed around mobility, disruption, and playmaking rather than raw damage output. Unlike traditional reinhardt-style shields, Winston excels at flanking, creating space, and forcing enemies into difficult decisions. His strength comes from his ability to isolate targets, pressure backlines, and initiate fights on his terms.
In 2026’s meta, Winston remains a cornerstone pick on certain maps and compositions. He counters passive playstyles, punishes stationary teams, and enables aggressive supports and DPS heroes to thrive. On maps like Ilios Well, Lijiang Tower, and portions of Numbani, a skilled Winston can single-handedly dictate the flow of a match. His jump pack provides unmatched vertical mobility, no other tank can contest high ground as quickly or efficiently.
What makes Winston essential to understand is that he’s not a brawler like Roadhog or Zarya. He’s a disruptor. He damages multiple targets simultaneously with his Tesla Cannon, forces enemies to react to his presence, and creates opportunities for teammates through chaos and zone control. New players often struggle because they approach Winston like a traditional tank, trying to hold ground and absorb damage. The reality is Winston thrives by refusing to stand still, constantly repositioning to maintain pressure and escape danger.
Winston’s Abilities Explained
Tesla Cannon
Winston’s primary weapon fires a continuous beam that deals 60 damage per second and hits all enemies in a moderate radius around his crosshair. Unlike hitscan weapons, the Tesla Cannon doesn’t require precision, you point vaguely at enemies and they take damage. This makes Winston forgiving for new players but also removes the skill ceiling that other heroes demand.
The Tesla Cannon’s range is roughly 8 meters, which is closer than it feels. This forces Winston into the thick of enemy formations, which is exactly where he wants to be. The damage ramps up when hitting multiple enemies simultaneously. Hitting three targets at once means 180 damage per second total, respectable pressure that forces entire teams to respond.
Don’t expect the Tesla Cannon to eliminate threats alone. Your job is to soften targets and create openings for DPS heroes to finish. Comboing the Tesla Cannon with your ultimate and other abilities yields far better results than spraying randomly.
Jump Pack
The Jump Pack is Winston’s defining ability and what separates good Winston players from bad ones. He leaps up to 15 meters away and lands with an AOE impact that deals up to 80 damage to enemies in the radius. The ability resets on elimination (kill or assist), which enables aggressive playmaking sequences.
Jump Pack has a 6-second cooldown on standard use, meaning you’ll use it frequently for repositioning, initiating fights, or escaping. The ability’s versatility is its strength, it’s mobility, damage, and engagement tool all in one. Mastering directional jumping and predicting landing spots separates Winston mains from one-tricks who just mash the button.
The impact damage matters more than beginners realize. A well-timed Jump Pack into a squishy target can deal significant chunk damage before your Tesla Cannon even starts firing. Practiced players use Jump Pack to land directly on enemies, maximizing impact radius and forcing them into immediate close-quarters exchanges they didn’t prepare for.
Barrier Projector
Winston’s shield generates a 700 health bubble around himself with a 9-second duration and 13-second cooldown. This bubble is his primary survival tool and one of the most misunderstood abilities in competitive play. Unlike Reinhardt’s shield or Zarya’s barriers, Winston’s Barrier Projector protects him in a sphere, meaning it blocks damage from all directions, including above and below.
The bubble blocks all incoming damage while active, including ultimates and environmental hazards. A common mistake is treating the barrier as perpetual protection. It has a set duration: after 9 seconds, it dissipates regardless of remaining health. Smart enemies bait the bubble and wait for it to expire before focusing fire.
Placing the barrier effectively requires understanding that it protects a fixed area. You can drop it between yourself and enemy fire, or place it slightly forward to protect nearby teammates. Against ultimate abilities like Reaper’s Death Blossom or Pharah’s Barrage, timing your bubble saves lives. The barrier also interrupts certain channeled abilities, making it valuable for defensive utility beyond raw mitigation.
Primal Rage Ultimate
Winston’s ultimate charges as he deals and takes damage, transforming him into an enraged primal state for 8 seconds. During Primal Rage, he gains 1000 additional health, increased movement speed, and his Jump Pack becomes unlimited with no cooldown. Each Jump Pack hit deals 40 damage instead of 80, but you can fire it 8+ times during the ultimate duration.
Primal Rage turns Winston into an unkillable dive machine that zones entire teams by sheer presence. Enemies prioritize escaping rather than engaging. The ultimate excels at breaking defensive positions, chasing low-health targets, and securing environmental kills (dropping enemies off ledges on maps like Ilios or Busan).
Timing is critical. Activating Primal Rage at optimal moments, when enemies are grouped, when your team’s DPS are ready to follow up, or when you need to contest an ultimate, maximizes value. Wasting Primal Rage by activating it into a staggered enemy or when your team isn’t positioned to capitalize is a common mistake that wastes ultimate economy.
Positioning And Map Awareness For Winston
Off-Tank Positioning Fundamentals
Winston’s positioning philosophy differs fundamentally from main tanks. While Reinhardt plants himself at chokes to create a wall, Winston constantly shifts, flanking, regrouping, re-engaging from different angles. Effective off-tank positioning means being where enemies don’t expect you but where your presence creates immediate problems.
Start engagements from natural cover or high ground when possible. Use buildings, boxes, and terrain to close the distance to enemy backlines safely. Your goal is to land on priority targets (healers, vulnerable DPS) and apply pressure before enemies react. The first few seconds of a fight determine momentum: if Winston lands cleanly and forces enemies into retreat, your team gains space and time to advance.
Don’t cluster with your main tank. Position 5-10 meters away from your team, offset to the side or high ground. This allows you to dive independently without feeding ultimate economy all at once. If your entire team dies together, team fights are lost. But if you’re off-positioning, trading your life for three enemies is acceptable, your team respawns shortly and plays the next fight at a numbers advantage.
Map awareness informs every position choice. Know enemy ultimate status, cooldown timers on key abilities, and teammate locations before committing to plays. Overwatch’s Winston matchups shift based on team composition, so positioning adjusts accordingly.
High-Ground Advantage Strategies
High ground is Winston’s natural habitat. Most heroes struggle to contest him there, and his vertical mobility lets him secure it faster than anyone else. Maps like Temple of Anubis, Volskaya Industries, and Route 66 have high ground positions that completely shift fights when controlled by Winston.
The strategy is simple: Jump Pack to high ground, apply pressure, and force enemies to respond. If they send a single person to challenge you, kill them. If they send multiple players, your team gains a 4v5 advantage on the main fight. Either outcome favors your team. High ground denial denies enemies escape routes, healing angles, and ultimate charge opportunities.
Be aware of flank routes that bypass high ground. Some maps have multiple routes to contested areas: enemies may ignore your high ground position and punch through via an alternative path. Read the map and position accordingly. On maps with limited flank routes, high ground becomes nearly uncontestable. On open maps, high ground is valuable but not sufficient alone.
Use high ground for ultimate building. Sitting on high ground and zapping enemies with your Tesla Cannon feeds ultimate charge faster than expected. A minute of high ground harassment can charge Primal Rage, allowing you to convert that advantage into a decisive fight-winning engagement.
Role And Team Synergy
Pairing Winston With Supports
Winston’s aggressive playstyle demands supports willing to follow him into chaos. Healers like Lúcio, Ana, and Zenyatta thrive alongside Winston because he creates space for them to operate safely. Lúcio especially, his speed boost accelerates Winston’s rotation, and his defensive ultimate protects against the burst damage Winston attracts.
Communication with supports is essential. Before diving, confirm your healer has resources (healing cooldowns available) and positioning that allows them to follow. Pushing aggressively without support coordination is suicide. Good Winston players signal their dives: “Looking to dive the backline right side” gives your Lúcio or Ana time to reposition and prepare.
Ana’s sleep dart provides extreme value by neutralizing targets Winston isolates. If Winston lands on a squishy DPS, a timely sleep dart prevents their escape and sets up guaranteed eliminations. Zenyatta’s discord orb amplifies Winston’s damage output, hitting a discorded target with your Tesla Cannon while other teammates focus it creates nearly unstoppable pressure.
Baptiste and Moira are less ideal because their healing requires line of sight (Baptiste) or leaves them close to the action (Moira), limiting their ability to support from safe positions. Mercy struggles when her primary tank (Winston) is constantly relocating and diving independently.
DPS Coordination And Teamfights
Winston’s role in teamfights is creating chaos, isolating targets, and applying simultaneous pressure that DPS heroes capitalize on. Hitscan DPS like Tracer, Ashe, and Soldier benefit from Winston’s disruption because his presence forces enemies to move, react, and lose positioning. Projectile-based DPS like Junkrat and Pharah thrive when Winston creates space and prevents enemies from grouping defensively.
Linear teamfight flow works against Winston. The best teamfights feature Winston diving one direction while your team presses the main fight, creating a 2v5 at the point of contact, then collapsing numerically when enemies split focus between the dive and the primary engagement. This requires DPS heroes willing to commit when they see Winston commit.
Watch high-level Overwatch gameplay, esports broadcasts on IGN’s gaming section or competitive highlights showcase professional Winston usage in teamfights. Professionals dive as a team, time their ultimates with Winston’s initiation, and collapse instantly to secure kills before enemies respond. Synchronization transforms Winston from “this tank is feeding” into “holy, that was a team-wipe.”
Communicate expected dive targets before fights begin. “I’m jumping the mercy, you focus her down” gives your team direction and prevents split focus that wastes Winston’s engage.
Common Mistakes New Winston Players Make
Overextending Without Team Support
The deadliest mistake new Winston players make is diving without confirming their team is ready to follow. Activating Jump Pack into three enemies while your team is behind cover doesn’t create a teamfight, it creates a 5v1 that ends with Winston eliminated and ultimate charged for the enemy team.
Always confirm team positioning before diving. Are your DPS actively engaged with enemies? Is your support ready to follow? Can your team collapse if you land clean? If the answer to any of these is “no,” hold the dive. Patience is hard when you’re excited to Jump Pack in, but feeding ultimate economy and staggering your team loses games faster than anything else.
Another overextension pattern: chasing kills too far from the point. Winston eliminates a low-health target and pursues them off the map, away from where the actual teamfight is happening. By the time Winston returns, his team is down 4v5 and the fight is lost. Secure kills near the objective, not by chasing enemies into the fog of war.
Barrier Management Errors
New Winston players treat the Barrier Projector as a panic button, they activate it when they’re low health and expect it to save them. Smart players bait the barrier, wait for it to expire, and immediately burst Winston down. This wastes the ability and turns it into a glorified stalling tool rather than the defensive utility it should be.
Effective barrier usage means timing it preemptively. If you expect enemy fire in the next 3 seconds, activate the barrier now so it protects you through that damage. If you’re at full health and diving into a team, bubble yourself and land on the enemy healer, the barrier buys you 9 seconds to output damage while they struggle to kill you.
Another error: placing the barrier incorrectly. The barrier is a sphere centered on Winston’s position (or slightly offset if you place it deliberately). Dropping it too far away from teammates means it doesn’t protect them. Dropping it in front of you when enemies flank means it blocks allied fire instead of enemy fire. Intentional barrier placement, positioning it to protect teammates or block incoming ultimate abilities, separates good Winston players from mediocre ones.
Don’t bubble when you’re already bubbled. Wait for your first barrier to expire or break before activating your next. Overlapping barriers waste cooldown duration.
Advanced Mechanics And Techniques
Bubble-Jumping And Movement Tech
Top-tier Winston players cancel Jump Pack landing lag by immediately activating their barrier as they land. This tech speeds up repositioning and prevents enemies from capitalizing on the brief moment where Winston is vulnerable after landing. Practice this consistently, activate your Jump Pack, and the instant your character starts landing, press your barrier button. The visual tells you when you’ve mastered it: you’ll notice reduced stun duration and faster follow-up actions.
Another movement technique involves momentum-based jumping. Jump Pack doesn’t just leap forward in the direction you’re aiming, if you’re moving sideways or backward while jumping, your momentum carries through the jump. Skilled Winston players strafe jump, meaning they move laterally while performing Jump Pack to land at unexpected angles. Enemies predict straight-line jumps: momentum-based positioning keeps them guessing.
Heightened awareness of terrain allows for creative Jump Pack placements. On maps with multiple levels, jump to unexpected positions between standard high ground spots. Landing on a middle tier between ground level and the main high ground confuses enemies about your positioning and prevents them from predicting your next move.
Practice against AI or in open custom games specifically for movement. Land Jump Packs consistently on marked locations, practice bubble-jumping fluidly, and develop muscle memory for momentum-based movement. This isn’t mechanical complexity for its own sake, every frame of faster repositioning is frame enemies can’t track you or prepare defensive responses.
Ultimate Economy And Timing
Ultimate economy separates competitive players from casual ones. Feeding enemy Primal Rage by making careless plays is a fast way to lose games. Conversely, building your ultimate faster and using it more effectively creates a winning strategy.
Ultimate builds by dealing damage and taking damage. Aggressive positioning where you’re dealing damage while enemies struggle to kill you (because of your barrier and mobility) charges Primal Rage at an accelerated rate. This is why high ground harassment with your Tesla Cannon is valuable, you’re charging ultimate while enemies expose themselves trying to reach you.
Timing Primal Rage with teammate ultimates multiplies value. If your Zenyatta just popped transcendence, using your Primal Rage to aggressively dive might waste both ultimates because enemies can counter-engage. But if you Primal Rage when enemies are grouped and your DPS have killing blows ready, the teamfight result is decided before enemies react.
Know when to hold Primal Rage. Sometimes the most valuable Primal Rage is the one you don’t use yet, because enemies waste resources trying to stop a dive that never comes. Psychological pressure matters. If enemies know you have Primal Rage and position defensively, you’ve already influenced the fight without activating it.
Weather information about ultimate timers is constantly changing in competitive play. Resources like Overwatch Ultimate Combos guides provide timing frameworks, but personal experience reading your specific team’s rhythm matters more.
Winston Matchups And Counter Picks
Favorable Matchups
Winston demolishes stationary targets and close-range heroes. Widowmaker, Bastion, and Torbjörn can’t effectively defend themselves against a Winston dive. These heroes are designed around positioning in one area and outputting sustained fire. Winston’s mobility nullifies their primary strength, his Jump Pack puts him on top of them before they can rotate or escape.
Zero-mobility DPS heroes struggle similarly. Ashe without her horse, Hanzo without escape options, and immobile supports like Lúcio (who relies on speed rather than raw escapes) become prey when Winston engages. The key is committing fully and eliminating these targets before teammates can rotate to help.
Zenyatta presents an interesting matchup. Winston can dive him, but discord orb amplifies incoming damage significantly. Experienced Zenyatta players reposition immediately when Winston dives, making the matchup neutral to slightly difficult depending on team coordination. But, if Winston coordinates with teammates to follow up, discorded Winston still dies faster than the enemy Zenyatta.
Lúcio is a positive matchup because he lacks range. His healing is effective, but his hitscan weapon has limited range. Winston closes distance instantly and forces Lucio into Speed Boost escape mode, separating him from the team. Smart Lúcio players jump to areas where Winston can’t immediately follow, but in tight corridors and chokes, Winston wins trades.
Difficult Matchups
Reaper is Winston’s hardest matchup. He deals massive close-range damage, heals himself with lifesteal, and has tools to escape dives (wraith form, shotgun knockback). Reaper specifically counters dive heroes because his kit is designed around punishing close-range engagement. Against Reaper, Winston needs team support and should avoid direct confrontation. Use your barrier to tank damage, maintain distance, and let teammates focus Reaper down while you harass at range.
Sombra is annoying because her hack ability disables your Jump Pack, barrier, and all mobility. A hacked Winston is a sitting duck, and Sombra’s damage output lets her burn Winston quickly. The counterplay involves positioning where Sombra can’t easily flank, grouping with teammates so Sombra has to decide between hacking you or attacking from range, and maintaining barrier discipline to block her burst damage.
Symmetra presents challenges because her turrets damage Winston significantly, and her shield blocks his Tesla Cannon. She can place her teleporter where Winston can’t access it, and her ultimate (Photon Barrier) blocks entire pathways. Against Symmetra, focus on destroying her turrets and avoiding predictable paths where her shield is positioned.
Villain McCree punishes poor positioning with stuns and high burst damage. His flash bang stops you completely, and Fan the Hammer burns through your health before you escape. Against McCree, approach from angles where he can’t stun you immediately, and use your barrier to block his ultimate fire. Coordinating with teammates to pressure McCree from multiple angles prevents him from focusing on the dive.
Check Overwatch Hero Counters resources to understand specific matchup mechanics and optimal play patterns for each scenario.
Climbing The Ranks With Winston
Hero Mastery Goals For Each Skill Tier
Bronze/Silver: Focus on not feeding. Master Jump Pack’s engagement range so you’re not consistently dying immediately. Understand when to hold Primal Rage instead of activating it into scattered enemies. Practice placing your barrier to protect yourself, not just to mitigate damage. Master the basics: know your damage numbers, understand your role differs from main tank, and stop engaging solo.
Gold/Platinum: Build positioning consistency. High-ground control should become automatic. Coordinate dives verbally with supports, confirming their readiness before engaging. Practice bubble-jumping to speed up repositioning. Study matchups, recognize when enemy composition counters Winston and adjust positioning accordingly. Start reading enemy ultimate charge and baiting bubbles proactively.
Diamond/Master: Develop intuition for ultimate timing and economy. Know when Primal Rage wins fights based on enemy positioning and teammate readiness. Master movement tech like momentum-based jumping and flank route prediction. Coordinate with your team at a higher level, communicating expected dive angles and timing rather than just “I’m diving in.” Study professional esports gameplay to understand macro-level positioning.
Grandmaster: Play Winston against similarly skilled opponents and focus on exploiting positioning nuances and miniature mistakes. Understand specific team compositions’ weaknesses and how Winston exploits them. Master ultimate economy to the point where you’re consistently building and deploying Primal Rage faster than enemies. Execute advanced positioning on every map automatically while focusing on reading opponent behavior and adapting on-the-fly.
Building Habits And Consistency
Climbing is about repeating winning patterns until they become automatic. Pick a few high-confidence maps where you consistently perform and main them. Focus on learning two or three key high-ground positions per map, then executing them perfectly in every game. Repetition breeds consistency.
Vocal communication changes game outcomes dramatically. Before fights, call out positioning and dive targets. During fights, provide real-time callouts: “I’m diving right, support follow me,” or “Barrier’s up, follow in.” Your teammates play better with information. This isn’t about sounding professional, it’s about removing ambiguity that costs teamfights.
Review your own gameplay. Record matches and watch them back, identifying moments where you overextended or made barrier mistakes. Compare your positioning to professional Winston gameplay on platforms like The Loadout’s Overwatch guides. Watch esports broadcasts and analyze when professional players dive and why. Note the common patterns.
Play consistently. Grinding one rank takes time, don’t expect instant results. Dedicate 20-30 hours to mastering Winston at your current rank, then reassess. If you’re still losing more than 50% of games, your fundamentals need work. If you’re winning consistently, you’re ready to climb.
Understand that team composition matters. Sometimes Winston isn’t the right pick regardless of skill level. If enemies have three Winston counters and your team doesn’t have tools to exploit, switching to a different tank maximizes your chances. Flexibility combined with Winston expertise makes you valuable to teams at all ranks.
Conclusion
Winston transforms from a confusing ball of hitpoints into an unkillable force when you understand his role, positioning, and mechanical nuances. He’s not a traditional tank, he’s a disruptor, a space creator, and a playmaker. Masters of the genius gorilla understand that Winston’s strength comes from creating problems enemies must solve, not from tanking damage like Reinhardt.
Start with fundamentals: consistent Jump Pack engagements, effective barrier timing, and basic positioning. Layer in intermediate skills like momentum-based jumping and high-ground harassment. Graduate to advanced techniques like ultimate economy optimization and professional-level positioning reads. Each level of mastery compounds on previous knowledge, building toward consistent high-tier performance.
The path from one rank to the next is paved with Winston games where you applied the principles in this guide: coordinating dives with your team, reading matchups accurately, managing your barrier intelligently, and building ultimate economy faster than enemies. There’s no shortcut, only consistent application of knowledge through ranked play.
Invest time into Winston specifically. Yes, your team might demand you play Reinhardt or Orisa occasionally, but dedicating 50-100 games to pure Winston mastery develops intuition that transfers to all other tanks. You’ll understand positioning deeply, game flow becomes predictable, and decision-making accelerates. That’s what separates competent tank players from exceptional ones. Now get in there and make that genius gorilla roar.