Table of Contents
ToggleTanks in Overwatch are the backbone of any successful team composition. Whether you’re pushing through chokepoints on Numbani or holding the high ground on Ilios, understanding how to play Overwatch tank characters effectively can be the difference between stomping your way through ranked or dropping SR. With Overwatch 2’s shift to a single tank per team, the role has become far more specialized and impactful, every mistake gets magnified, and every well-timed ability can turn the tide of battle. This guide breaks down every tank in the current meta, their playstyles, strengths, and how to master them in 2026.
Key Takeaways
- Master Overwatch tanks by understanding their core responsibilities: space control, damage absorption, team enablement, and ultimate economy management across different map types and game modes.
- Each tank excels in specific scenarios—Reinhardt dominates payload maps and chokepoints, Zarya rewards mechanical skill through bubble management and charge scaling, and Winston punishes isolated backline targets through dive initiation.
- Avoid common tank mistakes including overextending beyond team range, holding barriers passively, wasting ability cooldowns without backup plans, and fighting 1v5 situations that require team coordination.
- Tank selection should match your playstyle preference and team composition synergy; investing 50+ hours into one or two Overwatch tanks builds consistency and fundamentals faster than chasing meta picks.
- Effective tanking requires constant positioning awareness—stay within 15-20 meters of your team, anticipate enemy threats, time abilities strategically, and adapt your position based on map geometry and enemy composition.
Understanding The Tank Role In Overwatch
Core Responsibilities And Positioning
Tanks aren’t just walking HP bars. Your job is to create space for your team, absorb damage that would otherwise shred your squishier heroes, and establish positioning that controls engagement angles. Think of yourself as both a wall and a catalyst, you initiate fights, deny enemy positioning, and peel for teammates when things go sideways.
Your primary responsibilities:
- Space control: Positioning your body to block sightlines and deny enemy territory
- Damage absorption: Using abilities and positioning to mitigate incoming damage
- Team enablement: Creating opportunities for your DPS and support to output freely
- Ultimate economy: Building and managing your ultimate charge relative to enemy threats
Positioning varies wildly by tank. Reinhardt holds static chokepoints. Winston dives behind enemy lines. Zarya stays mid-range to maximize bubble value. The best tank players adapt their positioning based on enemy composition, map geometry, and their team’s current needs.
How Tanks Differ Across Game Modes
The optimal tank changes depending on the mode. In Escort, Reinhardt typically dominates because payload-adjacent positioning naturally suits his playstyle. Control Point matches reward aggressive initiators like Winston or Doomfist who can secure and hold high-ground positions. Hybrid maps demand flexibility, you might start on a stationary anchor like Reinhardt but pivot to a dive tank once the payload moves into open territory.
Each tank’s effectiveness fluctuates based on:
- Map layout: Tight corridors favor Reinhardt: open areas suit Winston
- Objective geometry: Payload escort benefits from shield camping: point control rewards mobility
- Team composition synergy: Some tanks enable specific DPS heroes better than others
- Enemy threats: A skilled Widowmaker shifts your positioning strategy entirely
Reinhardt: The Anchor Tank
Strengths, Weaknesses, And Playstyle
Reinhardt is the textbook anchor tank. His Barrier Field provides up to 1,500 HP of protection, making him invaluable on maps where your team needs to consolidate behind a shield. His Hammer packs 75 damage per swing with no damage falloff, and landing Charge combos remains satisfying even after years of play.
Strengths:
- Massive shield pool enables sustained team protection
- Close-range hammer damage crushes grouped enemies
- Charge provides both engagement and escape potential
- Fire Strike offers modest ranged poke and barrier break utility
Weaknesses:
- Zero ranged defensive tools outside Fire Strike
- Charge can be punished by smart enemies or environmental hazards
- Immobile compared to other tanks, once committed, you’re committed
- Shields break against sustained pressure from coordinated teams
To play Reinhardt effectively, identify a chokepoint or objective area where you can plant your shield and hold ground. Don’t overextend for kills: your job is damage mitigation. Watch your barrier health closely, once it drops below 400 HP, reposition behind cover to let it regenerate. Time your Earthshatter ultimate to catch clumped enemies, preferably after enemies waste defensive abilities like Lúcio’s Sound Barrier or Zenyatta’s Transcendence.
Reinhardt thrives on payload maps like Route 66 and Watchpoint: Gibraltar, where positioning yourself in front of the payload naturally creates an impenetrable defense.
Sigma: The Flex Off-Tank
Advanced Techniques And Team Synergy
Sigma occupies an interesting middle ground, he’s not a primary anchor like Reinhardt, but his Kinetic Grasp ability and Experimental Barrier give him tools to cover space without relying on a massive front-line presence. His Accretion stun interrupts enemy abilities, and his Gravitational Flux ultimate can scatter entire team formations or execute low-health targets.
Key mechanics:
- Kinetic Grasp absorbs projectiles (including ultimates) and converts 60% of absorbed damage into temporary shields
- Experimental Barrier deploys a 900 HP shield that can be moved and repositioned mid-fight
- Accretion throws a rock that stuns enemies and deals 60 damage on impact
- Gravitational Flux lifts all enemies in a large area and slams them down for up to 80 damage
Advanced players maximize Sigma’s flexibility by positioning his barrier in creative spots, suspended above terrain, angled to protect teammates while keeping him exposed enough to pressure enemies. Grasp timing matters enormously: absorbing a Zarya ultimate or Reinhardt Earthshatter at critical moments swings entire teamfights.
Team synergy shines when pairing Sigma with heroes who benefit from his ability to separate enemies (like Reaper or Mei) or who struggle against projectiles (since he neutralizes them). His barrier placement can create unexpected sightline advantages for hitscan DPS positioned behind cover. On control maps like Lijiang Tower, Sigma’s mobility and barrier repositioning excel at claiming and holding contested space.
Doomfist: The Aggressive Playmaker
Combo Builds And Matchup Strategies
Doomfist reworked in 2024 shifted him from a glass cannon into a brawl-focused tank who thrives on close-quarters combat and high-risk, high-reward plays. His Power Block ability reduces incoming damage by 40% and converts a portion into shields, while Rocket Punch remains his primary engagement tool, delivering up to 100 damage and knocking enemies back.
Optimal combos:
- Rocket Punch → Seismic Slam → Melee: Chains together for burst damage against isolated targets. Use Punch to close distance, Slam for follow-up splash, finish with melee for 25 additional damage.
- Power Block into Punch: Absorb incoming ability damage (like a Tracer clip or Reaper shot) to build shields, then aggressively engage while your opponent reloads.
- Meteor Strike setup: Position Rocket Punch to knock enemies into tight spaces or corners, then rain down your ultimate for guaranteed follow-up impact.
Matchup strategy:
Doomfist dominates against static tanks like Reinhardt and Sigma who can’t easily punish him once he closes distance. Against mobile heroes (Winston, Ramattra), your matchup flips, they’ll jump away before you connect, wasting your Punch. Avoid long-range duels with hitscan DPS: instead, use cover and Seismic Slam to approach unseen. Play around your Meteor Strike cooldown (8 seconds), after using it, you’re vulnerable during the recovery animation.
On maps like King’s Row, Doomfist excels in tight corridors where enemies can’t kite effectively. His damage output scales with ability management and positioning awareness rather than mechanical aim.
Zarya: The Utility Support Tank
Bubble Management And Damage Scaling
Zarya might be the most rewarding tank to master because her skill ceiling remains impossibly high. Her Particle Cannon deals 95 DPS at close range with no falloff, and her Projected Barrier shields teammates while building charge when enemies shoot the barrier. At high charge (80%), her damage nearly doubles, turning her into a menace.
Bubble management fundamentals:
- Self-bubble (12-second cooldown): Use proactively before entering expected damage, not reactively after taking hits. Predicting enemy fire separates good Zarya players from great ones.
- Projected Barrier (10-second cooldown): Timing teammate bubbles creates a multiplier effect. If your support is about to take a critical hit, bubble them preemptively.
- Charge tracking: Know when teammates are taking damage. Feed your bubbles strategically to high-value targets (like a low-health Widowmaker) to build charge while protecting them.
- Bubble timing against ultimates: Your bubbles can’t block the full damage of ultimates like Zarya’s own Gravitational Surge, but they prevent follow-up attacks from confirming kills.
Damage scaling fundamentals:
Zarya’s primary cannon damage scales from 95 DPS at 0% charge to ~170 DPS at full charge. This passive buff makes charge management your primary focus. Positioning closer to enemies allows more direct hits: positioning farther lets you poke and maintain range safety. Against fast-moving targets (Tracer, Genji), you might not land consistent beams, save bubbles for confirmed safety rather than fishing for charge.
Team synergy shines against ability-heavy compositions. If enemies have multiple cooldowns that generate damage (Rocket Barrage, Tactical Visor), your bubbles absorb those bursts while your team positions for counter-engagement. On Escort maps like Dorado, Zarya’s mid-range positioning and close-quarters beam excel at protecting the payload while maintaining pressure.
Ramattra: The High-Skill Duelist
Form Switching And Positioning Mastery
Ramattra’s dual-form mechanic makes him the most complex tank mechanically. His Omnic Form provides a defensive stance with Block (negates 40% of incoming damage and stores knockback) and ranged weapon output. His Nemesis Form transforms him into a melee brawler with Pummel (rapid close-range strikes) and Ramattra Strikes (powerful overhead swings).
Form switching strategy:
- Omnic Form dominance: Maintain this stance at range against ranged-heavy compositions. The Void Amplifier (his ultimate in Omnic Form) creates zones of amplified damage, making teamfighting near walls exponentially stronger.
- Nemesis Form engagements: Switch when enemies are grouped tightly or when you need burst damage against a low-health target. Watch your health carefully, Nemesis Form has no defensive tools.
- Mid-fight transitions: The 1-second transformation window makes switching risky mid-teamfight. Plan transformations around ability cooldowns and enemy positioning.
Positioning mastery:
In Omnic Form, position similarly to Sigma, mid-range, using terrain to create barriers between you and snipers. Your ranged attack has 20-meter effective range with a 2-second reload, so spacing matters enormously. In Nemesis Form, you’re committing to brawl-range engagements: approach corners slowly and ensure your team can support your aggression.
Ramattra’s ultimate Void Amplifier amplifies all damage dealt to enemies in a circular area by 40% for 8 seconds. Coordinate with your DPS to follow up, positioning your ultimate near a Widowmaker or Tracer essentially guarantees kills. On Control maps like New Junk City, alternating forms lets you adapt to dynamic pacing while maintaining consistent pressure.
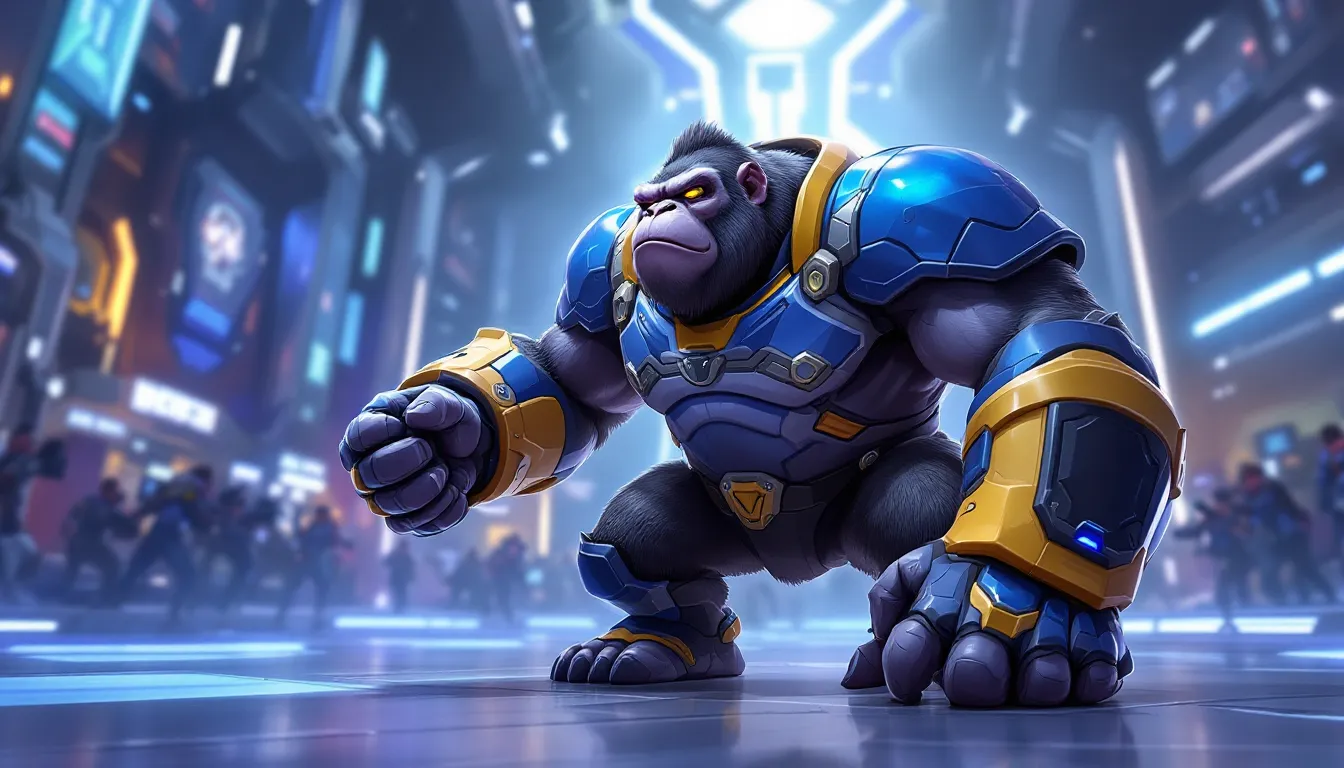
Winston: The Dive Initiator
Jump Pack Engagement And Escape Routes
Winston is the anti-anchor tank. His Jump Pack lets him reach elevated positions and engage enemies in isolated locations. His Barrier Projector drops a 600 HP dome that protects him and nearby teammates for 9 seconds. His Tesla Cannon automatically hits all enemies in range without requiring precision aim.
Jump Pack mastery:
- Engaging isolated targets: Jump to a perched Widowmaker or rogue Mercy before they expect it. Your 125 damage per second from Tesla Cannon shreds low-durability heroes in seconds.
- Escape routes: Always identify secondary jump points before committing. Climbing elevated terrain (like light fixtures or architectural overhangs) lets you escape dives from Doomfist or Ramattra.
- Timing: Jump Pack resets on elimination (enemy down to zero health), not assists. Secure the killing blow when possible to cycle your cooldown for escape.
- Cooldown awareness: 5-second Jump Pack cooldown means you’re vulnerable once you land. Jump into favorable conditions, near teammates or terrain that lets you dodge follow-up ability spam.
Team engagement strategy:
Winston thrives on teams with coordinated DPS who can follow up his engagement. Jumping in alone gets you deleted by focused fire. Communicate before engaging: “I’m jumping their Widowmaker in 3… 2… 1.” Your teammates rush through the gap you created, eliminating backline threats before enemies reorganize.
Barrier Projector is your survival tool, not your primary shield. Drop it when you’re low-health, when teammates are grouped nearby, or when you anticipate concentrated fire from ultimates. The 9-second duration means you can’t permanently hold positions like Reinhardt, you’re cycling between offense and defense constantly.
On maps like Ilios: Well, diving enemies clustered near the well opening presents low-risk, high-reward engagements. Your Tesla Cannon’s automatic damage excels in chaotic close-quarters scenarios where enemies can’t effectively strafe.
Choosing The Right Tank For Your Playstyle And Team Composition
Meta Picks And Climbing Competitive Ranks
The Overwatch tank meta shifts with patches and balance adjustments, but certain principles remain constant. As of early 2026, understanding Overwatch Hero Counters: Dominate Your Matches with These Must-Know Strategies ensures you’re selecting tanks that synergize with your team while countering enemy threats.
Meta-adaptive selection:
- Reinhardt reign: Reinhardt remains meta on payload maps and choke-heavy scenarios because his shield coverage directly enables team coordination.
- Zarya flexibility: High-level players gravitate toward Zarya because her charge mechanic rewards mechanical skill and decision-making.
- Winston comeback: When enemy backlines lack cohesion or defensive cooldowns, Winston punishes isolation relentlessly.
- Doomfist resurgence: Recent buffs to his Power Block made him viable into shield-heavy compositions.
Team composition synergy matters intensely. A Reinhardt pairs beautifully with Pharah (his barrier creates space for her rockets) but struggles against Widowmaker (she ignores his shield). Zarya synergizes with ability-heavy DPS like Genji (who triggers bubble resets) but needs range support against poke-heavy teams.
Climbing competitive ranks depends less on tank selection and more on mastering your chosen tank’s fundamentals. One-tricking a tank to Diamond requires understanding positioning, ability timing, and teamfight economy far more than chasing meta picks. That said, having two viable tanks in your pool lets you adapt without sacrificing proficiency.
Coaches at Overwatch Esports Guide: Unlock Your Path to Competitive Success Today emphasize that tank main climb faster when they specialize. Pick your tank(s), practice for 50+ hours, and focus on consistency rather than variety. Your hero pool’s depth matters less than your understanding of when and how to position.
Common Tank Mistakes And How To Avoid Them
Most tank players plateaued their SR because they’re committing the same recurring errors. Recognizing these patterns accelerates improvement dramatically.
Mistake #1: Overextending without backup
You spot a low-health enemy and charge forward, only to realize your team is still behind you 40 meters back. By the time you engage, enemies focus you down before your teammates can pressure back. Solution: Play within 15-20 meters of your team. Glance behind you constantly to ensure you’re not out of range of support abilities or DPS follow-up.
Mistake #2: Barrier babying
Reinhardt players grip their barrier like it’s protecting a newborn. They hold it up 100% of the time, moving zero meters, accomplishing nothing. Effective barrier play involves cycles: shield teammates for 3 seconds, drop barrier to attack for 2 seconds, reposition while regenerating. Stagnant positioning makes you predictable and easy to outflank.
Mistake #3: Ignoring charge/ability management
Zarya players waste bubbles on fully-healed teammates. Winston players jump without confirming escape routes. Doomfist players use Rocket Punch offensively when they should save it defensively. Every ability has opportunity cost, using it wrong creates vulnerability windows. Before activating any cooldown, ask yourself: “What’s my backup plan if this doesn’t connect?”
Mistake #4: Fighting 1v5
You’re a tank, so you have more health, you can solo-fight, right? Wrong. Even Reinhardt dies if 5 enemies focus fire. Tank strength multiplies with team support. If your team is scattered, regroup or stack. Playing frontline alone is a losing strategy at every rank.
Mistake #5: Tunnel vision on ultimates
You spend 30 seconds trying to set up the perfect Meteor Strike or Void Amplifier. Meanwhile, your team’s health bars are dropping, and enemies are scaling free damage. Sometimes your ultimate is a tool for survival or team enablement, not a flashy play. Use it when it guarantees value, not when you’re hunting for the 4K.
Resources like Game8 and Mobalytics maintain updated tank tier lists and positioning guides. Comparing your replays against high-level tank gameplay reveals gaps in your decision-making far more quickly than grinding ranked blind. Watch professional Overwatch on Dot Esports to see how pros position in similar scenarios, their tank play is instructional.
Conclusion
Mastering Overwatch tank characters transforms your entire game. Whether you gravitate toward Reinhardt’s straightforward anchor playstyle, Zarya’s skill-expressive charge mechanics, or Winston’s aggressive dive initiation, the tank role rewards understanding positioning, ability timing, and team synergy.
Start by selecting one tank that matches your playstyle preference. Invest 50 hours into mastering their mechanics. Focus on not making the common mistakes, maintaining proximity to your team, cycling abilities effectively, and adapting your positioning based on enemy composition. As your fundamentals solidify, you’ll climb ranks naturally.
Overwatch tank play continues evolving with patches and balance changes. Stay updated through Overwatch Ultimate Combos: Mastering Team Strategies for Epic Wins and competitive community resources. The heroes shift, the meta rotates, but the core principles of effective tanking, space control, damage mitigation, and team enablement, remain constant in 2026 and beyond.